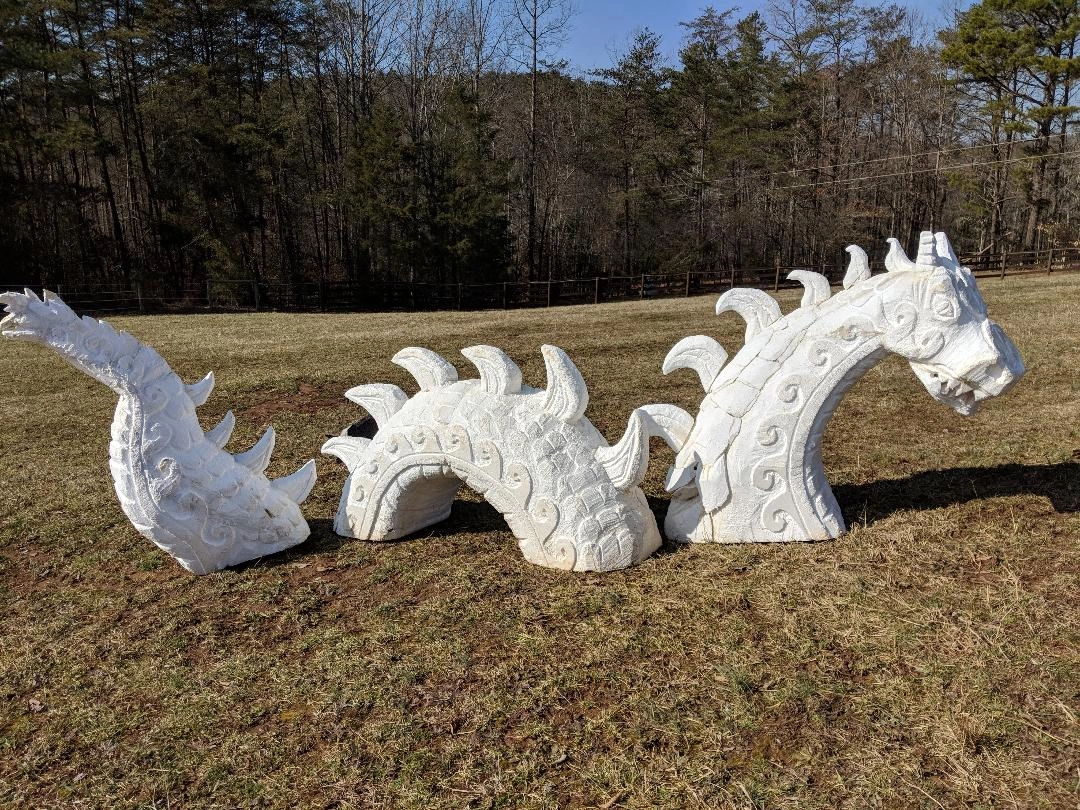
I have always wanted a sea serpent. Most places that I have lived have had an area that a sea serpent would want to live. Large or small ponds were in the back yard. One farm had a bend in the creek that would be deep enough for a small creature with the added benefit of a spectacular view from a bridge. If I had a choice of driving to work a boring way or down a road that a sea serpent lived on, I would have definitely looked forward to seeing the serpent every day.
After considering what materials to make the sea serpent out of, rejecting wood, papier Mache, polymer clay, I decided to carve one out of Styrofoam. I wanted three rather large blocks to work with. Finding them was a challenge; either too small, odd dimensions, or just way too expensive, not to mention the cost of shipping three large blocks. Then I found John Tamburo of Universal Foam Products. He helped me with the dimensions. Three blocks 36” X 36” X 24”. Then how to acquire them? Universal Foam Products had a warehouse in High Point, NC, only about an hour from me. The back of my pickup filled with three blocks of ideas, I drove home excited to begin work.
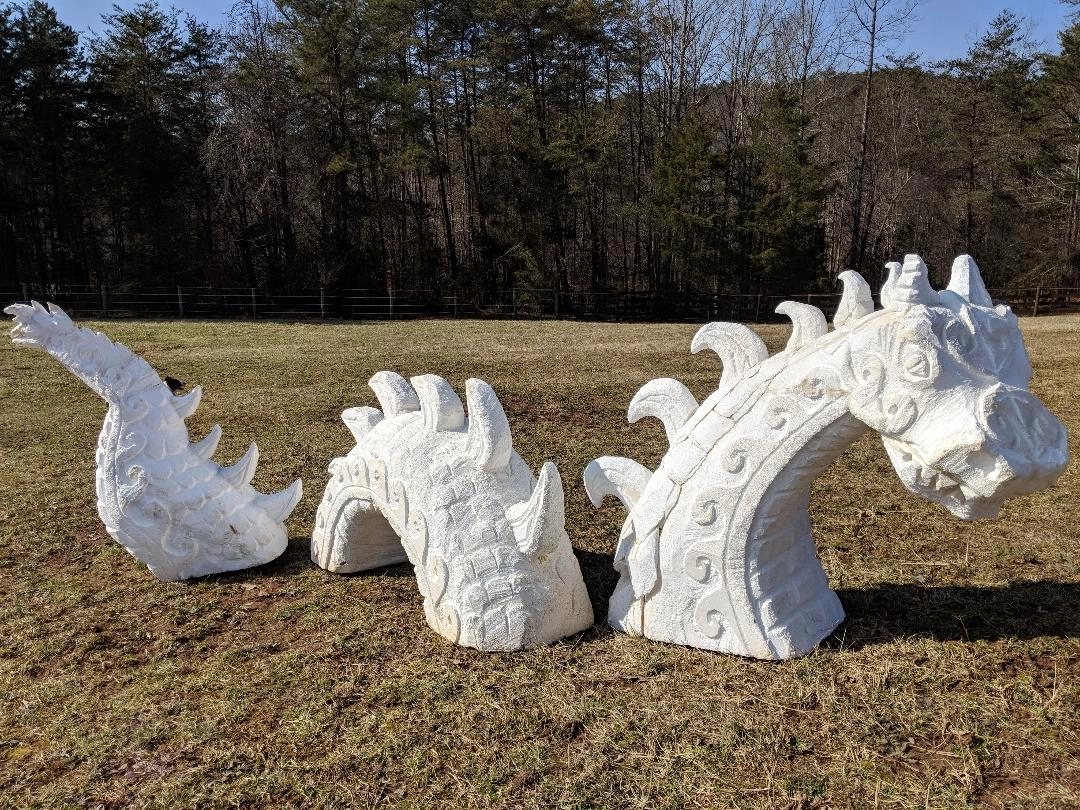
Experiments with carving tools and glues began. I like E6000 but it does not like Styrofoam, ended up using Gorilla Glue. After trying several carving utensils I settled on a pointy nosed saw and a serrated kitchen knife. I started on the middle section, carving out two arcs. I connected them with small wood dowels and glue. After shaping them, I added belly scales, the raised wave design on the sides, and the large top scales. Then I carved spikes and attached them with the wood dowels and glue.
Time to work on the tail. I was not happy with the piece I had designated for the tail. It needed to be thicker, so I added a large chunk to the front of it. Then I found I had to add pieces here and there to fill out areas. Rather time consuming but the tail was improved. Time to cut bottom scales and the wave design, top scales and add the spikes. Still using wood dowels to attach large pieces and bottle after large bottle of Gorilla Glue. By now it was mid-winter. North Carolina does have snow and cold days but there are still nice enough temperatures that I got the tail done and started on the head.
If I had known how hard it was to add little piece after little piece to make the curved neck and balanced head, I would have ordered another block of Styrofoam from Mr. John. I added some larger pieces, but found that I had to add 3-4 pieces and wait a day for the glue to set, carve out what was needed and then glue 3-4 new pieces on for the next day. The head was destined to take forever.
Watching glue dry is worse than watching paint dry, so I decided to paint. I wanted the top scales to be silver but any paint that was not water based would melt the Styrofoam. Almost ALL silver paint came in a spray can and was not acrylic. What to do, what to do? I put a layer of black acrylic paint on a test piece and then sprayed the silver on….the Styrofoam did not melt. Success!
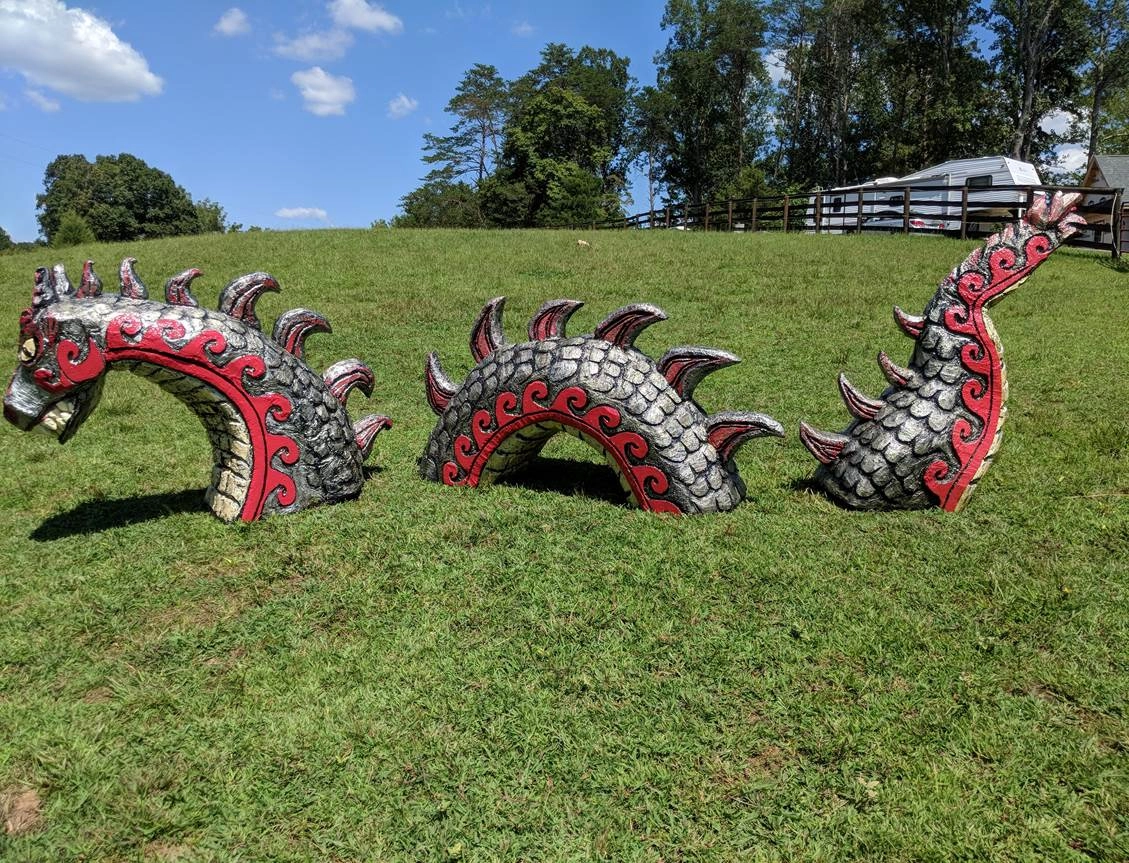
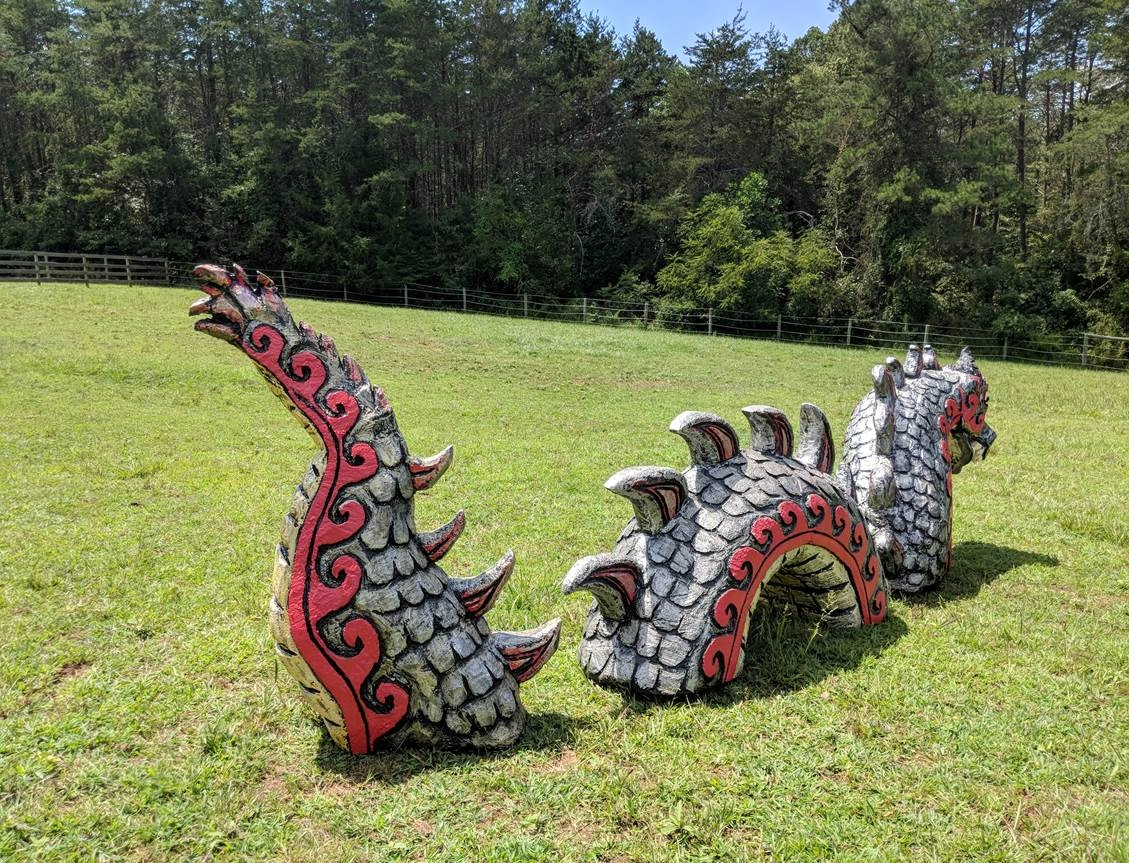
I was done carving on the middle section and started painting there. Carving had taken time, but the paint went on easy. Cream colored under belly with silver and black high lights, crimson waves on the sides, silver scales with black underneath and silver spikes with red and black high lights completed the creature. I sealed the total paint job with two layers of polyurethane.
I had to finish tweaking the tail. Adding a scale here and more spikes there, before it was ready to be painted. Once again the paint went on smoothly and was finished with no problem. The head and neck continued to be vexing. The neck was too small compared to the head. Adding piece after piece started to improve the look but it was a daily thing to add a little at a time. Also the sea serpent was becoming unbalanced and wanted to face plant his nose into the ground. Incorporating rocks in the back of the neck for balance fixed his inclination to fall. With all the little pieces added here and there, I also needed a little silicone caulking in the small cracks that Styrofoam was just too coarse to hide. Finally ready to paint the head! It had the same color scheme as the middle and the tail, but with extra crimson designs on the forehead and cheeks.
Now it was time to introduce Sea Serpent to water! I had the method of flotation thought out and materials acquired. Mother nature had different plans. A sudden spring storm sent an 80 foot yellow pine crashing into my pond. Right where the serpent was to go!! If he had been there, he would have been crushed. He is destined to be a land animal for now. There has been no time for removing the tree. It will be a major cut and drag operation. Living on a sea of grass is not a bad thing. The horses did not want to share at first but are grudgingly content now.
Maybe someone else’s pond is calling…..
Alice Black
Pilot Mountain, NC